Add PrintFriendly Button to Blogger or Blogspot Using the New User Interface
You can manually add the PrintFriendly button to your blog in four easy steps. If you prefer a simpler way, you can use blogger's built-in add widget tool.
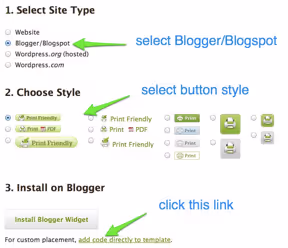
Step 1: Get the PrintFriendly button code.
- Go to our button page.
- Select Blogger/Blogspot.
- Select your button style.
- Click add code directly to template.
- Copy the code in the text box that appears.
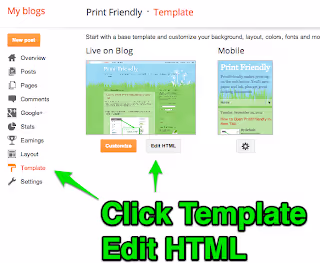
Step 2: Edit your blog's HTML template.
- Log into your blog dashboard.
- Click Template on the left navigation menu.
- Click Edit HMTL below your blog thumbnail.
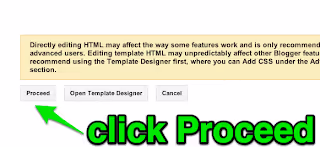
*Dynamic Views templates doesn't allow editing your HTML. You'll need to use the classic Blogger/Blogspot Templates.
- Click Proceed on the warning message.
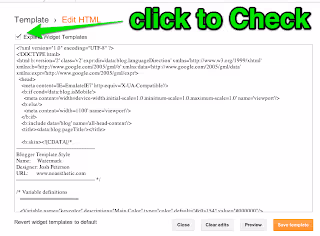
- An Editor will appear. Make sure to click the checkmark next to Expand Widget Templates
Step 3: Paste PrintFriendly Button Code.
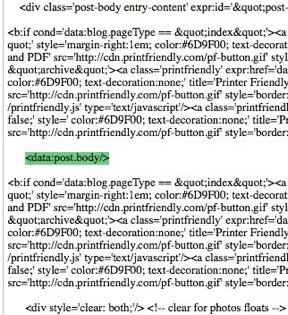
- Find <data:post.body/> in the Editor window.
* Tip: Press "Control" and "F" on keyboard to search. - Paste the PrintFriendly button code above <data:post.body/> to make the button appear above your posts. Paste the code below <data:post.body/> to place the button below your posts.
* Careful: There's two versions of <data:post.body/>. Use the first (web) not the second (mobile).
Step 4: Preview and save your changes.
- Click Preview.
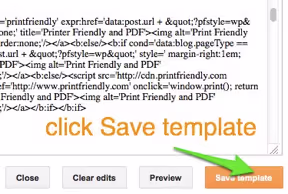
- Click Save template.
Related Posts

Add the PrintFriendly Button Using Blogger's Built-in Add Widget Tool
Blogger
Add the PrintFriendly Button Using Blogger's Built-in Add Widget Tool
Discover how to enhance your blog with the PrintFriendly button in just two simple steps. Learn how to effortlessly add this powerful tool to your posts, allowing your readers to generate print-friendly versions with ease and convenience.

Add PrintFriendly to Blogger or Blogspot
Blogger
Add PrintFriendly to Blogger or Blogspot
Learn an easy and beginner-friendly approach to integrate PrintFriendly into your Blogger or Blogspot platform. This step-by-step guide takes you through the process of obtaining the PrintFriendly button code, customizing it with your own graphic, and even aligning it to the right for a polished look, ultimately improving your readers' ability to print your content hassle-free.